The TSA Requirements Most Insulin Pump Users Don’t Know About

Have you ever stood in an airport security line wondering, How is this going to go? You’re not alone.
If you’ve read my Flying with Medical Devices guide, you already know traveling with medical equipment doesn’t have to be a headache—but when it comes to flying with an insulin pump, there are a few extra things you’ll want to get right.
Insulin pumps are essential, life-saving devices. And while airlines, TSA agents, and customs officials are used to seeing travelers with them, the process isn’t always as straightforward as we’d like.
In this guide to flying with an insulin I’m sharing exactly what you need to know to fly confidently with your insulin pump—whether you’re staying within the U.S. or heading overseas. I’ll walk you through the TSA rules, what to expect when going through customs, and the airline policies that matter most. I’ll also share some insider tips (and a personal story) to make things easier.
Let’s get started—because you’ve got places to be, and your insulin pump should never slow you down.
At The Keen Insider, we do the legwork so you can travel with medical devices prepared, informed, and worry-free. We monitor the latest TSA guidelines, customs rules, and airline requirements—and confirm with our team of experts in the field to ensure every guide reflects the most current policies.
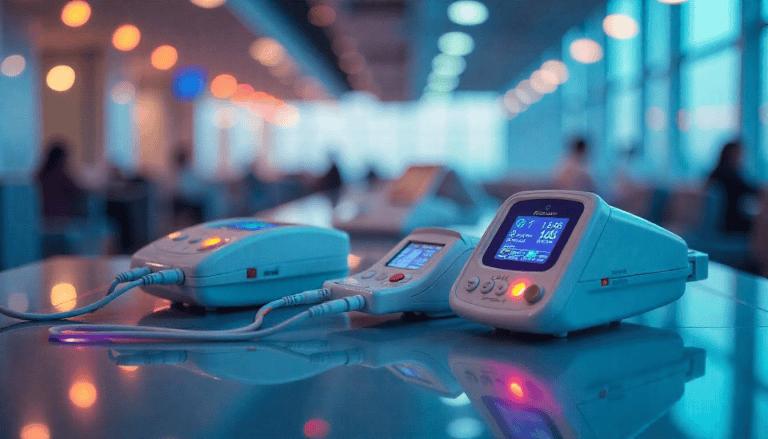
1. What You Need to Know About Flying with an Insulin Pump
I remember when my friend Linda was preparing for a flight to Italy with her insulin pump—she had a ton of questions. What if the TSA gave her a hard time? Would her pump trigger alarms? And how would she handle customs in a country that might not be familiar with her device?
For flights within the United States, you’ll deal with the TSA. They have clear guidelines about medical devices like insulin pumps and continuous glucose monitors. Most agents are trained to handle these screenings, but knowing your rights and the process ahead of time makes a big difference.
If you’re flying internationally, you’ll face an extra layer: Customs. Each country has its own rules for bringing in medical equipment and medication. Some require paperwork, others may ask you to declare your supplies, and in rare cases, you might run into language barriers. That’s why it helps to do a little research before you go.
2. TSA Guidelines for Flying with an Insulin Pump (Domestic U.S. Flights)
TSA officers see plenty of travelers with insulin pumps and diabetes supplies, but the experience can vary depending on the agent—and how prepared you are.

Let’s walk through what you need to know so you can avoid surprises and breeze through airport security.
2.1 TSA Rules and What They Mean for You
TSA in the U.S. officially allows passengers to bring their insulin pumps and diabetes supplies through security checkpoints. Your insulin pump is classified as a medical device, and you’re allowed to wear it during the screening process. However, not every screening method is ideal for pump users.
Here’s a quick overview of how TSA handles insulin pumps:
- You are not required to remove your pump or disconnect from it.
- TSA officers may ask questions, but you have the right to request an alternative screening if you don’t want to go through the imaging machines.
- You can also bring diabetes-related items such as insulin, syringes, test strips, and lancets. These are exempt from liquid limits but must be declared at security.
There are three main types of TSA screening methods to be aware of:
- Walk-through metal detectors – You can usually pass through these with your insulin pump. Some pumps might trigger an alarm, but this doesn’t happen every time.
- Full-body scanners (Advanced Imaging Technology) – Many insulin pump manufacturers recommend avoiding these scanners. The concern is that the electromagnetic waves or X-rays may interfere with your device’s function.
- Pat-down screenings – If you opt out of the scanner or the metal detector picks up your pump, you’ll receive a manual pat-down by a TSA officer of the same gender. They will also swab your hands and pump for explosive residue.
KEEN TIP: Let the TSA officer know that you’re wearing an insulin pump before you go through security. This saves time and sets expectations.
2.2 How to Prepare Before You Fly: What Most Insulin Pump Users Don’t Know
Here are a few smart steps to take that will make things infinitely smoother at airport screenings:
- Get a doctor’s note or medical documentation. This isn’t a TSA requirement, but it can help if questions come up. A short letter stating your need for an insulin pump and diabetes supplies can clarify things quickly.
- Label everything. Keep your insulin in its original packaging with your name on the prescription label. If you’re bringing syringes, pen needles, or lancets, keep them in clearly marked containers.
- Pack a separate diabetes travel bag. Use a dedicated bag or pouch for all your diabetes-related supplies. This keeps everything organized and easy to present at the checkpoint.
KEEN TIP: Keep your insulin and pump in your carry-on, never in checked luggage. Checked baggage is subject to temperature extremes that can damage insulin and sensitive equipment.
2.3 Screening Process Step-by-Step
Once you get to security, here’s what typically happens:
- Tell the TSA officer you’re wearing an insulin pump. You can do this verbally or by handing over a TSA Medical Notification Card (optional, but helpful).
- You’ll be asked if you can go through the metal detector. If you prefer not to—or your pump manufacturer recommends against it—you can request a pat-down instead.
- During the pat-down, an officer will inspect the area around your pump, and they may swab your hands and device for traces of explosives. This is routine.
- Your diabetes supplies will be visually inspected or swabbed if you’re carrying liquids (like insulin or juice boxes for hypoglycemia).
If you’re ever unsure, you can ask for a private screening room and have a companion present.
KEEN TIP: Always arrive at the airport early! Give yourself at least two hours for domestic flights, more if it’s a busy travel time. Security can take longer when you request alternative screening.
3. Airline Policies for Passengers with Insulin Pumps

Once you’ve made it through security, you might think the hardest part is over. But air travel with an insulin pump requires a few extra considerations once you’re onboard.
The good news? Most airlines are familiar with passengers flying with insulin pumps. The key is letting them know your needs ahead of time, and making sure you have everything you need for the flight.
3.1 Informing the Airline in Advance
You’re not required to tell the airline you’re flying with an insulin pump—but it can be a huge help. If you think you’ll need extra time boarding, help stowing your gear, or any sort of assistance, it’s best to contact the airline at least 48 hours in advance. Some airlines recommend notifying them even earlier for international flights.
Here’s how to handle it:
- Call your airline’s customer service after you book your flight. Explain that you’re traveling with an insulin pump and ask if there are any special procedures. Most agents will make a note on your reservation.
- You use a continuous glucose monitor (CGM) that connects via Bluetooth and want to confirm it can be used in flight. If you’re not sure how to travel with your CGM, check out my complete guide to flying with a CGM.
- Some airlines may ask you to complete a medical clearance form, especially if you need to use additional medical equipment during the flight (like a portable oxygen concentrator). Insulin pumps typically don’t require this, but it’s worth asking.
KEEN TIP: Confirm with customer service whether pre-boarding is available to you. It makes managing your carry-on and getting settled much easier.
3.2 Best Seating and Accessibility Considerations
Where you sit on the plane can make a difference when you’re traveling with an insulin pump, especially on long flights.
Consider these tips when choosing your seat:
- Choose an aisle seat near the bathroom if you think you’ll need to access it frequently to manage your pump or CGM. It’s also easier to stretch your legs and stay active.
- If your pump needs to be charged (some hybrid devices do), ask about power outlets near your seat. Not all planes have them, and not all seats offer the same access. Check your airline’s website or seat maps when you book.
- Some travelers with diabetes prefer sitting near the galley so they can request water or snacks more easily.
KEEN TIP: Pre-board if you need extra time! Most airlines allow passengers with medical conditions to board early. This gives you time to get settled, organize your supplies, and speak with the flight attendants if needed.
4. Customs Procedures for International Travel
TSA rules only apply within the United States, so once you head overseas, you’ll encounter customs procedures and airport security that can be very different.
Some countries are familiar with insulin pumps and other diabetes equipment, but others may ask more questions or have stricter regulations.
4.1 What to Expect at International Customs
When you arrive in another country, you’ll typically go through customs before you leave the airport. In many places, you’ll need to declare that you are carrying medications, syringes, and medical devices like your insulin pump. If you’re bringing a larger supply of insulin or injectable medications, some countries may want to see proof that it’s for personal use.
The best way to explain your insulin pump and supplies is by carrying a doctor’s letter. It should state that you have diabetes and that you rely on an insulin pump and related supplies for your health. Having your prescriptions, ideally in their original packaging with the pharmacy label, can also make the process smoother.
KEEN TIP: Carry translation cards explaining your condition and equipment! It makes customs inspections faster and reduces misunderstandings.
Don’t have a translation? Ask for a customs supervisor. They are multilingual.
4.2 Traveling with Insulin Across Borders
Each country has its own rules about how much insulin and how many diabetes supplies you can bring in. Some countries require you to register your medication before arrival, while others limit the quantity you can carry.

This is why it’s so important to research medication laws for each country you’ll be visiting. A good starting place is at the US Embassy at your destination if you are traveling from the US. Otherwise, look up your home country’s embassy at the location you are traveling to.
Be sure to bring a letter from your doctor explaining your diagnosis and listing all the medications and equipment you are bringing with you. Be sure the letter includes generic names of medications, as brand names may not be recognized in other countries. Keep your prescriptions handy in case customs officials ask to see them.
Climate is another factor to keep in mind when traveling internationally with insulin. Long flights, hot weather, or cold climates can affect your insulin’s potency. Insulated medication bags or Frio cooling wallets are great options for keeping insulin at a safe temperature while in transit. Once you reach your destination, check whether your accommodations offer a refrigerator, or request one in advance.
KEEN TIP: Keep all of your insulin and diabetes supplies in your carry-on luggage. Checked baggage can be lost or delayed, and your medications should always be within reach.
4.3 Airport Security Outside the U.S.
Airport security procedures can vary widely from one country to another. While many international airports use procedures similar to TSA’s, you may encounter different screening equipment and policies. Some countries rely more heavily on body scanners than metal detectors, and security agents may be less familiar with insulin pumps.
If your insulin pump manufacturer recommends avoiding body scanners, you have the right to request a manual pat-down instead. Politely explain your situation to the security officer and provide your doctor’s letter if needed. Many agents will swab your insulin pump or test your insulin vials as part of the screening process, which is routine.
Language barriers may be a factor again during the security screening process. A translation card that describes your medical condition and equipment can be a valuable tool for explaining your needs. If you feel your rights aren’t being respected, you can request to speak with a supervisor.
KEEN TIP: Know your rights, but stay patient and respectful. Good communication and having the right documentation will help you get through airport security more smoothly.
5. Carry-On vs. Checked Luggage: What’s Best for Insulin Pump Users?
Whether you’re traveling domestically or internationally, it’s always safer to keep your pump and diabetes supplies in your carry-on bag, not in checked luggage. Let’s talk about why—and how to pack everything to keep it safe and accessible.
5.1 Why Carry-On is Usually the Safest Choice

Checked bags are convenient for clothes and shoes, but not for sensitive medical supplies. Insulin, insulin pumps, and continuous glucose monitors (CGMs) are delicate. They can be damaged by extreme temperatures, rough handling, and long delays that are common with checked luggage.
Here’s why carry-on is the safer choice:
- Checked luggage is often exposed to temperature extremes. Cargo holds can get very cold or very hot, which can damage insulin and other diabetes equipment.
- There’s always the risk that checked luggage will be lost, delayed, or sent to the wrong destination. You don’t want to be stuck without your insulin or pump if this happens.
- Insulin pumps, infusion sets, and sensors are fragile and can break if they’re tossed around inside a suitcase.
When you pack everything in your carry-on, you have control. Your insulin stays at the correct temperature, and your supplies are within reach if you need them during the flight.
5.2 Packing Your Diabetes Supplies Efficiently
Once you’ve decided to carry everything on board, the next step is packing it smartly. It’s best to keep all your diabetes supplies together in one dedicated bag or pouch so you can easily present it during security screening or if a customs officer asks to inspect it.
Here’s how to pack efficiently and safely:
- Use a separate diabetes travel bag with compartments for your pump supplies, insulin, syringes, lancets, glucose tablets, and snacks.
- Keep insulin in its original pharmacy packaging with the prescription label attached. This helps avoid any confusion during inspections.
- Use insulated medication bags or a Frio cooling wallet to keep insulin at a safe temperature, especially on longer flights or in hot climates.
- Bring backup supplies. It’s a good idea to carry double what you think you’ll need—extra insulin, infusion sets, batteries, sensors, and even a backup glucometer in case your CGM stops working.
- If you’re traveling with liquids (like insulin), know that TSA and most international security agencies allow medically necessary liquids over the usual 3.4-ounce limit. You just need to declare them at the security checkpoint.
- Pack glucose tabs or juice boxes in an easy-to-reach spot in case your blood sugar drops during the flight.
KEEN TIP: Pack backup supplies in separate places within your carry-on. If one pouch is lost or stolen, you’ll have a backup set in another part of your bag.
5.3 Traveling with Batteries for Your Pump or Charger
Most insulin pumps use internal rechargeable batteries or external battery packs. If you’re traveling with extra batteries, portable chargers, or a backup charging cable, it’s important to follow airline safety rules.
- Spare lithium-ion batteries (like those used in power banks) must be packed in your carry-on, not checked luggage.
- TSA allows batteries under 100 watt-hours without prior approval. Most diabetes-related chargers fall well below this limit.
- If you’re bringing a portable power bank, make sure it’s labeled with the watt-hour rating.
- Avoid using damaged or heavily worn batteries—TSA may confiscate them if they appear hazardous.
KEEN TIP: Always store batteries in a protective case or pouch to prevent them from coming into contact with metal objects in your bag (like keys or coins), which could cause a short circuit. Read more about charging your insulin pump for air travel with a lithium battery in our guide Can You Fly with a Power Bank?
6. Common Challenges and How to Overcome Them
Even with the best planning, things don’t always go perfectly when you’re flying with an insulin pump. Flights get delayed, equipment malfunctions, and sometimes your blood sugar doesn’t cooperate. Knowing how to handle these situations before they happen makes a huge difference in how smoothly your trip goes.
6.1 What If Your Pump Malfunctions During a Flight?
An insulin pump malfunction mid-flight is rare, but it can happen. Air pressure changes, cabin temperatures, or a simple technical issue might affect how your pump delivers insulin. The first step is to stay calm—you can handle this.
If your pump stops working, you’ll need to switch to manual insulin delivery until you can troubleshoot or replace the device. Make sure you bring backup supplies, such as:
- Insulin pens or syringes for manual injections
- A long-acting insulin option, if your healthcare provider has recommended one as part of your travel plan
- Extra pump batteries or charging cables, if applicable
Let a flight attendant know if you need help, but most of the time, you can handle a pump issue quietly in your seat. If you need to adjust or reconnect tubing, the airplane bathroom can offer privacy.
KEEN TIP: Before your trip, talk to your doctor about a backup insulin plan in case your pump stops working. Having clear instructions in advance takes the guesswork out of an already stressful situation.
6.2 Dealing with Delays and Long Layovers
Flight delays and layovers can be tough on anyone, but they present extra challenges when you’re managing diabetes. Delays can throw off your eating schedule, insulin delivery, and blood sugar control.
Here’s how to stay ahead of it:
- Pack extra snacks in case of delays or missed meals
- Keep glucose tablets or juice boxes handy for unexpected lows
- Carry more insulin than you think you’ll need in case you’re stuck somewhere longer than planned
- If you’re spending hours in an airport during a layover, make sure your insulin stays cool by using an insulated bag or Frio wallet
- Adjust your pump’s settings if your activity level or meal timing changes significantly
KEEN TIP: If your flight is delayed on the tarmac, don’t hesitate to let the flight crew know you have diabetes and need access to snacks, water, or medication. They are trained to assist passengers with medical needs.
7. My Friend’s Experience Flying with an Insulin Pump
When my friend Linda planned a long-overdue trip to visit her family overseas, it was her first time flying internationally since getting an insulin pump; she was more than a little nervous about the entire process.
The first thing Linda did was call her pump manufacturer to confirm whether she could go through the airport body scanners. As it turned out, her pump maker strongly recommended avoiding the scanners to prevent possible malfunctions. That meant she needed to request a pat-down at airport security, which she wasn’t thrilled about, but at least she knew what to expect.
We also put together a travel folder for her. It had a letter from her doctor explaining that she used an insulin pump and carried injectable insulin, along with printed prescriptions and copies of her health insurance information. she tucked that folder in her carry-on bag, right next to her diabetes supplies.
Linda got to the airport early, explained to the TSA officer that she was wearing an insulin pump, and asked for a pat-down instead of going through the scanner.
Things got a little bit tricky at customs when she landed. The customs agent in Italy asked why she was carrying so much insulin and a bag of syringes. Linda handed over her doctor’s letter and translation card, and that solved the problem right away. Without those documents, it could have been a much more stressful experience.
KEEN TIP: Learn from Linda—put together a simple travel folder with your doctor’s letter, prescriptions, and translation cards. It’s a small step that makes a big difference in customs and security lines.
8. Frequently Asked Questions (FAQ’s)
8.1 Can I go through TSA with my insulin pump?
Yes, you can. TSA allows travelers to wear their insulin pumps through security. However, many pump manufacturers advise against going through full-body scanners, as these can potentially interfere with the device. If you want to avoid the scanner, notify a TSA officer that you’re wearing a medical device and request a pat-down instead.
8.2 Do I need a doctor’s letter for my insulin pump?
While it’s not a requirement by TSA, carrying a doctor’s letter is highly recommended. The letter should explain that you have diabetes and need to carry an insulin pump and related supplies. This can help clear up any confusion with TSA, airline staff, or customs officials, especially when flying internationally.
8.3 Should I remove my insulin pump during screening?
No, you should not remove your insulin pump during security screening. You are allowed to wear your pump through TSA screening. If you prefer not to go through the metal detector or body scanner, you can request an alternative screening (pat-down) while keeping your pump attached.
8.4 How do I explain my pump at international customs?
When you go through customs, explain that your insulin pump is a medical device used to manage diabetes. Having a doctor’s letter and your prescriptions available helps. If there’s a language barrier, presenting a translation card that explains your condition and equipment can speed things up and avoid misunderstandings.
8.5 Can I pack insulin in checked baggage?
It’s not recommended. Insulin should be kept in your carry-on because checked baggage can be exposed to extreme temperatures, which may damage the medication. You’ll also need access to your insulin and supplies in case of delays or lost luggage.
8.6 What happens if my pump battery dies on the plane?
If your insulin pump battery dies mid-flight, you should have extra batteries or a charging cable in your carry-on. If the pump stops working entirely, switch to your backup method for insulin delivery, like syringes or insulin pens, until you can fix or replace the battery. Flight attendants are trained to help so don’t hesitate to reach out to one.
8.7 Are insulin pumps allowed on all airlines?
Yes, insulin pumps are allowed on all airlines. They are considered essential medical devices. However, it’s a good idea to inform the airline in advance if you’ll need special assistance, extra time to board, or if you plan to use electronic devices like a continuous glucose monitor that syncs with your pump.
9. Wrap Up
Flying with an insulin pump doesn’t have to be complicated or stressful if you’re prepared. Whether you’re traveling domestically or internationally, understanding the rules for TSA, customs, and individual airlines can make your trip smoother and give you peace of mind.
The most important takeaways? Always keep your insulin pump, insulin, and other diabetes supplies in your carry-on bag. Have your doctor’s letter and prescriptions handy, especially when traveling overseas. Communicate with TSA officers, customs agents, and airline staff about your needs, and don’t hesitate to request alternative screening if your pump manufacturer recommends it.
MY FINAL TIP: The more prepared you are, the less stressful travel becomes. A little planning can make a big difference.