Complete Guide to Flying with Mobility Devices: Wheelchairs, Rollators & Scooters
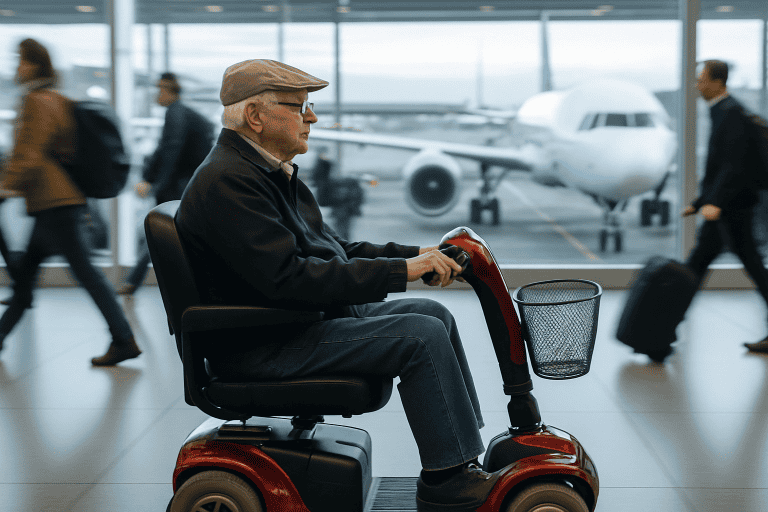
Picture this: You’ve finally booked that dream vacation or essential family visit. The excitement builds as you plan your itinerary, book accommodations, and pack your bags. But then reality hits – you need to navigate airport security, airline policies, and baggage handling with your wheelchair, rollator, or mobility scooter.
Suddenly, what should be the start of an adventure becomes a source of anxiety. Will your device be damaged in transit? Are you following the right TSA procedures? What if your mobility aid doesn’t fit airline requirements? You’re not alone in these concerns – nearly 27 million Americans use mobility devices, and many avoid air travel entirely due to these uncertainties.
Here’s the truth: Flying with mobility devices doesn’t have to be stressful, complicated, or risky when you know the right strategies.
💡 After extensive research, conversations with travelers who use mobility devices daily, and analysis of current airline policies, I’ve discovered that most travel nightmares stem from three critical gaps:
✔️ Lack of device-specific knowledge – Airlines treat all mobility devices the same, but a wheelchair has vastly different requirements than a rollator
✔️ Outdated or incomplete information – Policies change frequently, and generic travel advice rarely addresses mobility-specific concerns
✔️ Poor preparation – Without proper planning, even simple trips become logistical challenges
This guide solves all three problems with actionable strategies you can use immediately.
What You’ll Learn
- 📌 Device-specific airline policies for wheelchairs, rollators, and mobility scooters
- 📌 TSA procedures demystified – what actually happens at security checkpoints
- 📌 Protection strategies to prevent damage during transport
- 📌 How to select travel-friendly mobility devices
- 📌 Emergency backup plans for when things go wrong
Let’s transform your travel experience from stressful to seamless.
1. TSA Security Procedures for Mobility Devices
TSA screening for mobility devices follows specific protocols that vary by device type. Understanding these procedures eliminates surprises and reduces screening time.
1.1 Wheelchair Security Screening Process
Manual wheelchairs go through standard X-ray screening if they fit through the machine. Power wheelchairs require physical inspection due to batteries and electronics.
Manual Wheelchair Screening:
- Remove all personal items and accessories before approaching the X-ray machine. TSA agents will ask you to empty wheelchair pouches, remove cushions, and take off any detachable parts like armrests or footrests.
- Transfer to an airport wheelchair if you’re able. This speeds up the process as the wheelchair can go through the X-ray machine without you in it.
- TSA will hand-inspect cushions, armrests, and storage compartments using explosive detection equipment.
- Typical screening time: 3-5 minutes
Power Wheelchair Screening:

- Battery terminals will be visually inspected by TSA agents who are trained to identify different battery types. They’ll check that terminals are properly covered and batteries are secured.
- TSA agents might swab electronic components or ask you to demonstrate that the wheelchair functions properly.
- You remain in your wheelchair during the entire screening process. TSA cannot require you to transfer unless you’re physically able and choose to do so.
- Typical screening time: 8-12 minutes, longer if batteries require detailed inspection.
KEEN TIP: Arrive at security 30 minutes earlier than standard recommendations. Mobility device screening takes longer, especially during peak travel times.
Pre-Security Checklist:
✅ Remove all loose items from wheelchair pouches
✅ Ensure battery terminals are accessible for inspection
✅ Have medical documentation ready if requested
✅ Charge devices fully before travel
✅ Bring backup battery if applicable
1.2 Rollator and Walker Inspection
Rollators and walkers typically pass through standard X-ray machines. TSA agents may request physical inspection if they detect unfamiliar objects.
Standard Inspection Process:
- Fold your rollator before placing it on the X-ray belt if the mechanism allows, if TSA checkpoint has a narrow machine.
- Remove any attached bags, cup holders, or accessories before screening. These items go through separately.
- TSA may test handles and metal components for explosive residue using specialized swabs.
- You may be asked to demonstrate the folding mechanism if TSA agents are unfamiliar with your specific model.
Items That Trigger Additional Screening:

- Oxygen tank attachments require documentation and special handling procedures. Notify TSA immediately if your rollator has oxygen equipment.
- Electronic components like LED lights or electronic brakes need additional testing.
- Large storage compartments or baskets get a thorough hand inspection.
- Medical device attachments such as IV pole mounts or specialized grips require explanation to TSA agents who may not recognize medical equipment.
KEEN TIP: Practice folding your rollator quickly before travel. Some models have complex mechanisms that confuse TSA agents, leading to longer inspections.
1.3 Mobility Scooter Battery Requirements
Mobility scooter batteries face strict TSA regulations. Lithium batteries have different rules than sealed lead-acid batteries.
Lithium Battery Rules:
- ❗ ❌ 🛑 🔴 The lithium battery be removable and carried in the cabin with you! Airlines won’t allow lithium batteries in cargo holds due to fire risk. If your battery isn’t removable, you cannot fly with that scooter.
- Maximum 300 watt-hours per battery. Check your battery label for this specification – it’s usually printed near the model number. Batteries over 300Wh are prohibited on passenger aircraft.
- Terminals must be protected from short circuit using plastic caps, tape, or manufacturer-provided covers. Exposed terminals can spark and cause fires in the cabin.
- Scooter goes in cargo, battery stays with you in a carry-on bag. Airlines provide special packaging for the battery, but bring your own protective case as backup.
Sealed Lead-Acid Battery Rules:
- Can remain attached to your scooter during flight. These batteries are considered safer for cargo transport than lithium batteries.
- Must be spillproof and properly sealed with no visible damage or corrosion. Airlines will reject batteries with cracks, leaks, or corroded terminals.
- Battery terminals require insulation using rubber caps or electrical tape. This prevents accidental contact during handling that could drain the battery or cause sparks.
- Scooter and battery both go in cargo hold. Airlines handle these as oversized baggage with special loading procedures.
Battery Documentation Checklist:
✅ Battery specification sheet showing watt-hours – usually found in your owner’s manual or printed on the battery label
✅ Manufacturer’s safety certification proving the battery meets aviation standards – required for international flights
✅ Terminal protection covers installed and photographed before travel for insurance purposes
✅ Removal tools if lithium battery – some batteries require special keys or tools that TSA needs to see
✅ Backup battery if traveling long distances – particularly important for international trips where charging opportunities are limited
KEEN TIP: Call your airline 48 hours before travel to confirm battery requirements. Rules change frequently, and gate agents often lack current information.
1.4 Required Documentation and Medical Letters
Medical documentation isn’t always required but can expedite screening and prevent complications.
Recommended Documentation:
- Prescription or medical necessity letter from your doctor explaining why you need the device including specific medical conditions and mobility limitations.
- Device manual (if you have it) with specifications including weight, dimensions, and battery information. Airlines use this to determine handling procedures.
- Battery information sheet with watt-hour ratings and safety certifications. 💡 Print this from the manufacturer’s website if you don’t have the original.
- Insurance or ownership documentation proving the device belongs to you. This expedites customs clearance and helps with damage claims.
When Documentation Is Required:
- You need documentation when traveling to countries with strict medical device import rules. The EU, Australia, and Japan have specific requirements.
- Devices with unusual attachments that TSA agents may not recognize.
- Custom modifications or adaptations that alter the device’s original design.
- Insurance claims if damage occurs during transport. Airlines need proof of ownership and device value for compensation.
Documentation Checklist:
✅ Doctor’s letter on official letterhead dated within 90 days of travel for international flights stating the reason for the device.
✅ Device serial numbers and model information written on a separate card in case the device is lost
✅ Battery specifications and certifications downloaded from manufacturer’s website as PDF backup
✅ Contact information for device manufacturer including 24/7 customer service numbers for emergencies
✅ Travel insurance policy numbers and claim procedures saved in your phone for quick access
🔔 📣 Get a FREE DOCTOR’S LETTER template that includes exactly what TSA and customs agent want to see when you travel with mobility devices.
KEEN TIP: Save all documentation in your phone as photos. Physical papers can be lost, but digital copies ensure you always have backup verification.
2. Protection and Damage Prevention
Airlines handle over 2 million wheelchairs and mobility devices annually, with damage rates averaging 1.5% according to DOT data. Most damage occurs during loading and unloading, making proper protection essential.
2.1 Essential Travel Cases and Covers
Wheelchair travel bags reduce damage risk by 85% based on manufacturer testing. The right protection depends on your device type, travel frequency, and budget.
Protection Types: Hard cases offer maximum protection for expensive power wheelchairs but add significant weight and bulk. Soft covers provide basic scratch and moisture protection while remaining lightweight and packable. Universal bags work for most manual wheelchairs, while device-specific covers ensure proper fit and security.
Key Protection Areas: Focus protection on vulnerable components like folding mechanisms, electronic controls, and removable parts. Battery protection is essential for power devices, requiring approved transport cases with proper padding. Wheels and armrests suffer the most damage during baggage handling.
KEEN TIP: Never travel without some form of protection. Even a basic soft cover prevents scratches and keeps your device clean during transport.
For detailed reviews of the best wheelchair travel bags, rollator cases, and mobility device protection gear, including specific product recommendations and pricing comparisons, see our [complete buying guide to mobility device travel cases].
2.2 Pre-Flight Device Inspection Checklist
Document your device’s condition before each flight. Airlines require proof of pre-existing damage to deny damage claims.
Visual Inspection Process: Take photos of your device from multiple angles before checking in. Focus on areas prone to damage like wheels, armrests, and electronic components. Record serial numbers and note any existing scratches or wear.
Functional Testing: Test all moving parts including brakes, folding mechanisms, and electronic controls. Verify battery charge levels and ensure backup batteries are functional. Check tire pressure and wheel alignment since these commonly suffer during transport.
Pre-Flight Checklist:
✅ Photograph device from 6 different angles before airport arrival
✅ Test all electronic functions and record battery percentage
✅ Verify all removable parts are secure or separately packed
✅ Check tire pressure and wheel condition
✅ Ensure insurance documentation is current and accessible
2.3 What to Do When Your Device Gets Damaged
Nobody wants to think about their wheelchair or scooter getting damaged, but airlines handle baggage roughly. Knowing what to do in those first crucial minutes at baggage claim can mean the difference between getting compensated and fighting for months.
The Baggage Claim Moment: Your heart sinks when you see a new scratch or bent wheel. Don’t panic, but act fast. Airlines give you a tiny window to report damage, and once you leave that baggage area, proving when damage occurred becomes nearly impossible.
📌 Walk around your device completely before touching anything else. Take photos immediately, even if other passengers are waiting. Compare what you see to those pre-flight photos on your phone. If something looks different, damaged, or broken, find an airline representative right away.
📌 Getting It in Writing: Airlines train their staff to minimize damage claims. They’ll often say “just file online later” or “we can’t help you here.” Don’t accept this. Insist on written documentation before leaving the airport.
📌 You have 24 hours for domestic flights and 7 days for international flights to file written reports. Miss these deadlines and airlines will deny your claim regardless of damage severity. Include every detail you notice – that small scratch could indicate deeper damage discovered later.
Photography That Actually Works: Take photos like you’re building a legal case, because you might be. Get close-ups of specific damage and wide shots showing your device’s overall condition. Include something in the frame that proves location and time – airport signs, your boarding pass, or baggage claim monitors work perfectly.
📌 Don’t forget serial numbers and model information. Insurance companies and airlines often request this information weeks later when your memory isn’t fresh.
KEEN TIP: 🚨 ❗️ Turn on your phone’s location services before taking photos. The embedded GPS data provides undeniable proof of when and where damage was discovered, making it much harder for airlines to claim the damage happened elsewhere.
2.4 Insurance and Liability Coverage
Domestic Flight Coverage: On domestic US flights, airlines are responsible for 100% of the cost to repair or replace damaged wheelchairs up to the original purchase price of the device. This unlimited liability provides strong protection for expensive power wheelchairs that can cost $15,000-40,000.
International Flight Limitations: International flights follow Montreal Convention limits of approximately €1,400 (£1,300/$1,700) for damaged mobility equipment. However, many European airlines including Lufthansa and Air Canada, voluntarily waive these limits and pay full replacement costs when damage exceeds treaty limits.
🔔 📣 New Enforcement Reality: The DOT issued a landmark $50 million penalty against American Airlines in October 2024 for wheelchair mishandling violations. New proposed rules include fines up to $124,000 per incident, signaling stricter enforcement ahead.
KEEN TIP: For international travel with expensive mobility devices, comprehensive travel insurance with medical equipment coverage is essential. The Montreal Convention’s $1,700 limit won’t cover even basic power wheelchairs, making additional insurance crucial for financial protection.
Insurance Checklist:
✅ Verify travel insurance includes mobility device coverage up to full replacement value for international trips
✅ Understand that domestic flights provide unlimited airline liability while international flights are limited to approximately $1,700
✅ Document device value with receipts, photos, and serial numbers before travel
✅ Check homeowner’s/renter’s insurance for travel coverage extensions
✅ Know that new DOT enforcement actions are dramatically increasing airline penalties for mishandling
Check Out Third-Party Coverage Options: Some homeowner’s or renter’s insurance policies cover mobility devices during travel. Health insurance plans occasionally include durable medical equipment coverage for travel damage. Premium credit cards may offer limited travel insurance, but rarely cover mobility devices specifically.
Compensation Process: Airlines must provide immediate written notification when devices are damaged, offer loaner equipment, and allow passengers to choose repair vendors. Documentation requirements include damage photos, original purchase receipts, and prompt reporting within specified timeframes.
Sources:
- DOT Airline Passengers with Disabilities Bill of Rights: https://www.transportation.gov/airconsumer/disabilitybillofrights
- American Airlines $50M Penalty: https://www.transportation.gov/briefing-room/dot-issues-landmark-50-million-penalty-against-american-airlines-its-treatment
- 2024 Damage Statistics: https://wheelchairtravel.org/ranking-best-worst-airlines-wheelchair-users-2024/
3. International Travel Considerations
Flying internationally with mobility devices involves additional regulations that vary dramatically by country. What works for domestic US travel may be completely prohibited elsewhere.
3.1 Country-Specific Mobility Device Regulations
European Union countries follow standardized regulations, but individual nations add their own requirements. Japan has strict battery import rules that can ground your trip if you’re unprepared. Australia requires advance documentation that takes weeks to process.
European Union
EU countries accept most mobility devices, but have strict battery rules. Lithium batteries over 100Wh need special paperwork that most people don’t have. Call your airline 48 hours before flying with power wheelchairs.
Japan
Japan prohibits lithium batteries over 160Wh in passenger cabins, lower than US limits. All mobility devices require customs declarations upon arrival. Prescription documentation must be translated into Japanese for devices that appear medical in nature.
Australia and New Zealand
Both countries require advance approval for larger batteries (over 100Wh). You’ll need paperwork from the manufacturer and battery certificates. Officials may check your device for dirt or debris, especially wheels and storage areas.
United Kingdom Post-Brexit
UK battery rules are now different from EU rules. Check current requirements before traveling since they change often.
KEEN TIP: Contact the destination country’s embassy or consulate before booking flights. Regulations change frequently, and outdated information online can cause expensive travel delays.
3.2 Customs Declarations and Paperwork
Customs officials worldwide treat mobility devices as potential commercial imports unless you have proper documentation proving personal use and medical necessity.
Required: 🎯 Medical necessity letters from licensed physicians carry the most weight with customs officials. Include specific medical conditions requiring the device and estimated duration of need. Letters should be recent, dated within 90 days of travel for most countries.
Customs Declaration Tips: Declare mobility devices honestly on customs forms even when not required. Undeclared medical equipment can trigger intensive inspections and potential seizure. Carry the receipt if you still have it.
KEEN TIP: 🎯 List approximate values conservatively since customs may assess duties on inflated amounts.
3.3 Charging Your Device Abroad
US chargers use different voltage than most countries, which can permanently damage your battery system if plugged in wrong.
What You Need:
✅ Plug adapters for different outlet shapes
✅ Voltage converters (US uses 110V, most countries use 220V)
✅ Or buy a universal charger that works everywhere
Plan Ahead: Hotels often don’t allow high-power devices in rooms. Find charging locations before you travel since batteries take 6-8 hours to charge.
KEEN TIP: 🚨 ❗️ Buy high-quality voltage converters rated for your charger’s wattage. Cheap converters often fail with mobility device chargers, leaving you stranded abroad.
4. Best Travel-Friendly Mobility Devices
Not all mobility devices are created equal when it comes to air travel. The right equipment can make the difference between a smooth journey and a travel nightmare. Here’s what to look for in each category and where to find detailed product recommendations.
4.1 Choosing Travel-Friendly Rollators
Portable rollators for air travel need quick folding mechanisms and lightweight frames under 15 pounds. Look for models with removable bags and smooth wheels that handle airport surfaces well.
Travel Rollator Checklist:
✅ Weighs less than 20 pounds for easy lifting
✅ Folds quickly without tools or complex steps
✅ Has removable storage bags and accessories
✅ Features smooth wheels suitable for various surfaces
✅ Includes a carrying case or travel bag
✅ Meets airline size restrictions when folded
For our complete review of the best travel rollators with specific model recommendations, pricing comparisons, and detailed specifications, see our Best Portable Rollators for Air Travel guide.
4.2 Travel Wheelchairs: Manual and Power Options
Travel wheelchairs come in both manual and power versions, each designed to handle airline restrictions differently. Manual models prioritize lightweight portability, while power models focus on battery compliance and easier disassembly.
Travel Wheelchair Checklist:
✅ Manual: Weighs under 25 pounds with quick-release wheels
✅ Power: Weighs under 35 pounds with airline-approved batteries
✅ Folds or disassembles to compact size for cargo holds
✅ Features removable components (footrests, armrests, batteries)
✅ Includes transport accessories (travel bags, battery covers)
✅ Reassembles easily without specialized tools
For detailed reviews of both manual and power travel wheelchairs including weight comparisons, battery specifications, and airline compatibility, check out our Lightest Travel Wheelchair for Planes and Cars.
4.3 Compact Mobility Scooters for Flying
Travel-friendly mobility scooters must disassemble easily, have airline-approved batteries, and reassemble without tools. Weight and size restrictions make this the most challenging category for air travel.
Travel Scooter Checklist:
✅ Breaks down into pieces, each between 30 – 47 pounds each
✅ Uses removable lithium batteries under 300Wh or sealed lead-acid
✅ Assembles/disassembles in under 10 minutes without tools
✅ Includes battery terminal covers and removal tools
✅ Comes with hard protective cases for electronics and battery
✅ Main components fit standard airline cargo door dimensions
For comprehensive mobility scooter reviews including battery compatibility, disassembly guides, and airline approval status, see our Best Travel Mobility Scooters guide for plane travel, cruises and road trips.
KEEN TIP: Before purchasing any mobility device for travel, check with your preferred airlines about specific size and weight restrictions.
4.4 Travel-Friendly Canes, Walking Sticks, and Walking Aids
Folding canes, collapsible walking sticks, and specialty walking aids offer the ultimate in travel convenience – many fold small enough to fit in carry-on bags or backpacks. I always had a folding cane in my tote in case the cobblestone streets in Nice started taking a toll on my husband’s back.
Modern options include GPS tracking, LED lights, built-in seats, shock absorption, and ergonomic grips designed for extended use.
Travel Walking Aid Checklist:
✅ Folds or telescopes to under 12 inches for easy packing
✅ Weighs less than 2 pounds (or 3 pounds for seat canes)
✅ Features secure locking mechanisms when extended
✅ Includes wrist strap or clip for hands-free moments
✅ Offers adjustable height for proper fit
✅ Provides interchangeable tips for different terrain
For detailed reviews of folding canes, seat canes, collapsible walking sticks, GPS-enabled walking aids, and specialty travel supports including packing tips and durability testing, see our [Best Travel Walking Aids guide].
5. Emergency Backup Plans
Even with perfect planning, unexpected situations can leave you without your mobility device. Having backup plans prevents emergencies from ruining your entire trip.
5.1 Device Rental and Replacement at Destinations
When your mobility device is damaged beyond quick repair or doesn’t arrive with your flight, rental equipment becomes your lifeline. Not all rental options are created equal.
- Finding Quality Rentals Abroad: 💡Research rental companies before you travel, not when you’re stranded at the airport. Major cities usually have medical equipment rental companies, but quality varies dramatically.
- What to Expect: Rental wheelchairs and scooters are basic models, typically manual and designed for short-term use. Don’t expect the comfort or features of your personal device.
- Booking Strategy: Keep rental company contact information in your phone and know their emergency procedures for after-hours assistance.
- Hotel and Tour Coordination: 💡 💡 Many hotels can arrange mobility equipment rentals, sometimes faster than you can. Tour companies often have relationships with local medical suppliers and may provide equipment as part of accessible tour packages.
KEEN TIP: Take photos of rental equipment before using it. Document any existing damage to avoid being charged for pre-existing problems when you return the device.
5.2 When Your Device Doesn’t Fit the Aircraft
Last-minute aircraft changes can leave you with a mobility device that’s too large for the new plane’s cargo hold. Airlines are required to accommodate you, but the solutions aren’t always convenient.
Aircraft Substitution Scenarios: Smaller regional jets often replace larger aircraft due to weather or mechanical issues. Your power wheelchair that fit the original Boeing 737 might not fit the substitute CRJ-200. Airlines must provide alternative solutions.
Your Rights and Options: Under new DOT regulations effective January 16, 2025, airlines must offer rebooking on the next available flight with suitable aircraft at no additional cost when your wheelchair doesn’t fit. Airlines must also reimburse fare differences if you’re forced to book a more expensive flight that can accommodate your device.
Rental Equipment Costs: Airlines must provide loaner wheelchairs while yours is delayed or repaired, but they’re not required to pay for independent rental costs. However, if your wheelchair is delayed, airlines must reimburse transportation costs to/from the airport with proper receipts.
What Airlines Must Provide (January 2025 DOT Regulations):
✅ Return of devices within 24 hours (domestic) or 30 hours (international)
✅ Free rebooking on next available flight with suitable aircraft
✅ Fare difference reimbursement if you book more expensive flight to accommodate your device
✅ Loaner wheelchair or scooter that meets your functional and safety needs
✅ Reimbursement for transportation costs to/from airport when device is delayed
✅ Written notification of your rights when devices are mishandled
✅ Choice of preferred vendor for repairs or replacement
6. Wrap Up
Flying with mobility devices doesn’t have to be stressful when you’re prepared. With new DOT regulations taking effect in 2025, airlines face stricter accountability for wheelchair and mobility device handling than ever before. Understanding your rights, preparing proper documentation, and having backup plans transforms potential travel nightmares into manageable situations.
Remember the key steps:
- ✔️ Know TSA procedures for your specific device type
- ✔️ Protect your equipment with proper cases and documentation
- ✔️ Understand compensation limits and insurance coverage
- ✔️ Research international requirements before traveling
- ✔️ Choose travel-friendly equipment when possible
- ✔️ Have emergency backup plans ready
The goal isn’t to avoid challenges entirely – it’s to handle them confidently when they arise. Armed with the strategies in this guide, you can focus on what matters most – reaching your destination safely and enjoying your journey.